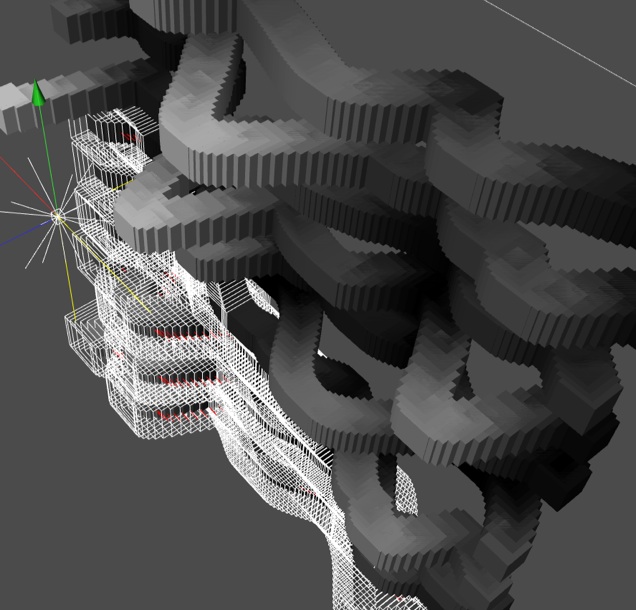
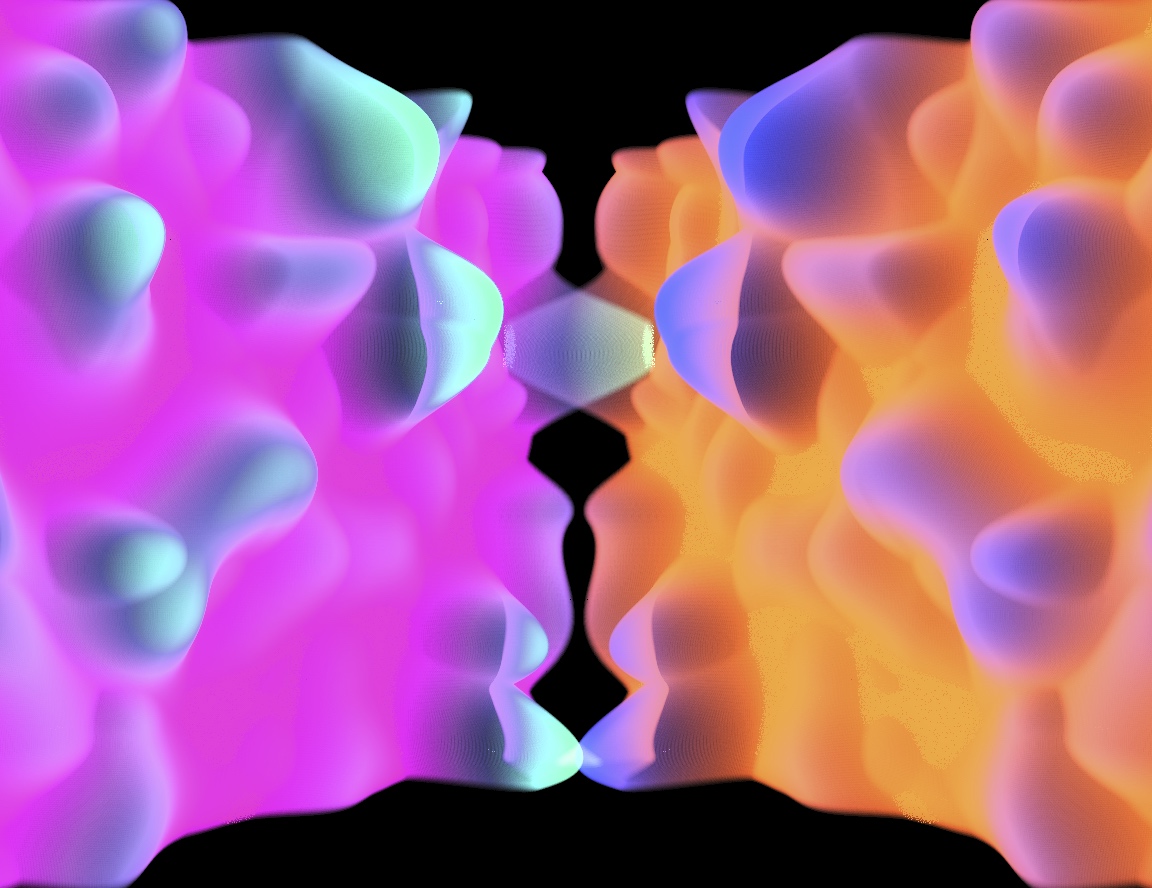
Finally making some progress, using new Vray 1.2 It's possible to use proxies with mograph thus allowing vast numbers of polygon objects to be rendered. Image below is made up of thousands of transparent spheres, thus creating a volumetric effect like fire where each sphere is additive so when they clump or overlap it becomes brighter shifting the color up thru the hues to the point of white, which is how light behaves opposed to say paint where it gets darker as you add things.


You can render it using an unbiased light cache method too which actually works pretty fast considering, and gives it a more noisy/stochastic kinda look which smooths out the longer you render (like maxwell render)
Getting it to balance memory and cpu cores was a bit tricky, default render settings tend to lock up and not use multi cores properly when geometry is this dense. Also it seems when polygons overlap exactly as they often do in these cases the renderer locks up focusses on one thread/core hanging all the others and then eventually pushes thru. Tweaking render settings seems to have removed this issue or at least made it less apparent keeping all cores at 100%
In any case it renders fairly fast now compared to previous efforts, though It's still devastatingly slow for animation.

Lots of balls
And cubes
You can render it using an unbiased light cache method too which actually works pretty fast considering, and gives it a more noisy/stochastic kinda look which smooths out the longer you render (like maxwell render)
Getting it to balance memory and cpu cores was a bit tricky, default render settings tend to lock up and not use multi cores properly when geometry is this dense. Also it seems when polygons overlap exactly as they often do in these cases the renderer locks up focusses on one thread/core hanging all the others and then eventually pushes thru. Tweaking render settings seems to have removed this issue or at least made it less apparent keeping all cores at 100%
In any case it renders fairly fast now compared to previous efforts, though It's still devastatingly slow for animation.
Lots of balls
:-)
And cubes
How to create a super duper SuperTexture, and why you want to
I've been looking into ways to make maps more interesting given the games limitation of 8 ground textures per map, so I set about thinking about possible ways to add unique textures and details for my upcoming mods and maps, I had a few weird ideas I've attached at the bottom for laughs and to possibly spread ideas and find some use for it for someone!
I ended up finding a really nice way of doing it using Doodad-Decals or as I like to call them: super duper SuperTextures, Why would you want it, what is it, what can it achieve?
It should even be possible (haven't tried it just yet) to animate move/show/hide Decals during game play. So you could have the ground texture moving or fading from one texture to another, say to go from Grass to Snowfall and all sorts. Imagine lava rising and covering the lush green planes of your map, with this you could have those lush grass planes set on fire and permanently be replaced by scorched earth after the lava retracts. Note if you animated It's height position it would animate the area it affects fading in.
I did a quick test, this is all done with one single big image texture (2048x2048)
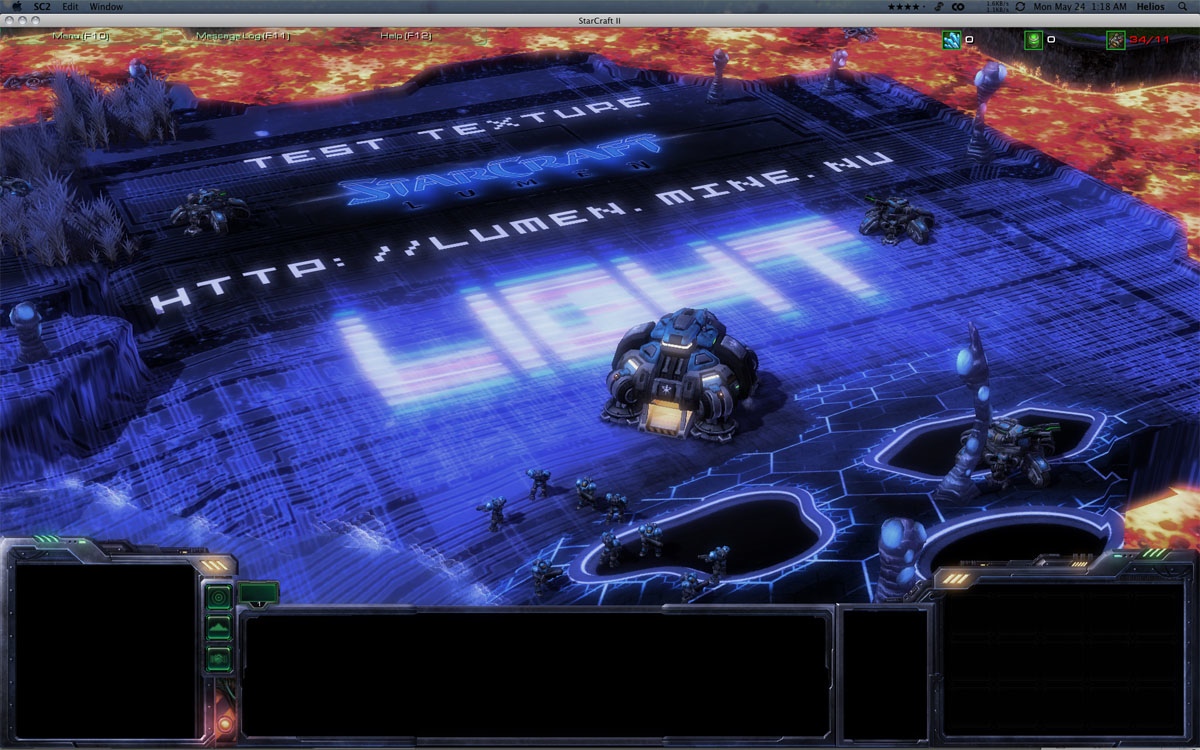
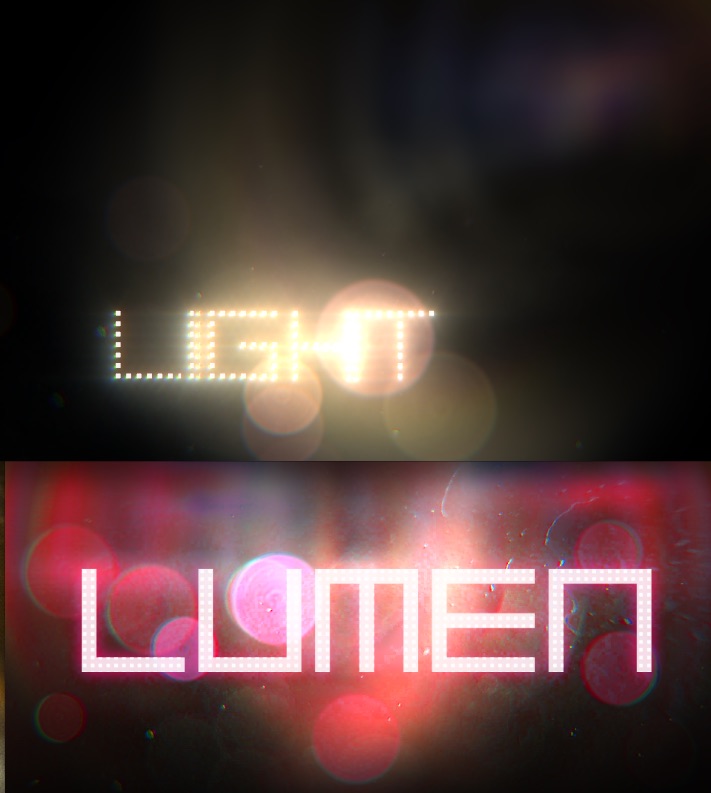
Link: lumen.mine.nu
So this is all done with A single Doodad-Decal, Yes, turns out decals are pretty powerful:
Decals are normally only used for small little arrows, numbers or border lines, turns out nothing is stopping you from making them super large and high res, possibly even covering an entire map in one go.
Other bonus is they can have an alpha mask so they show thru underlaying terrain or even other underlaying Decals. And I believe in theory they can have an emissive map making them glow in the dark or even bloom with a glow. Many fancy effects should be possible once we can edit materials/shaders (which we can't do right now rule as Blizzard have not released proper import/export tools for .m3) For example if we could edit the shaders it should in theory be possible to make the floor reflective like water I think, no idea what would happen over uneven terrain.. id like to find out though! But that's just a theory. It might even be possible to animate them or do any of the fancy visual effects you see on units in the game.
They also support Normal/Bump maps so you can have roughness and bump detail painted over uniquely,
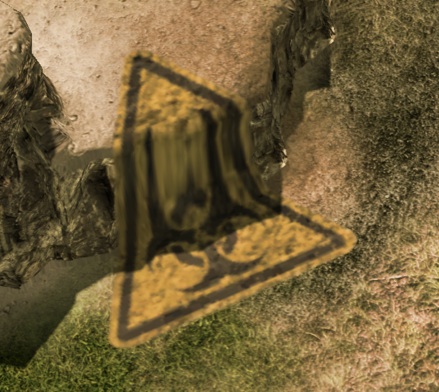
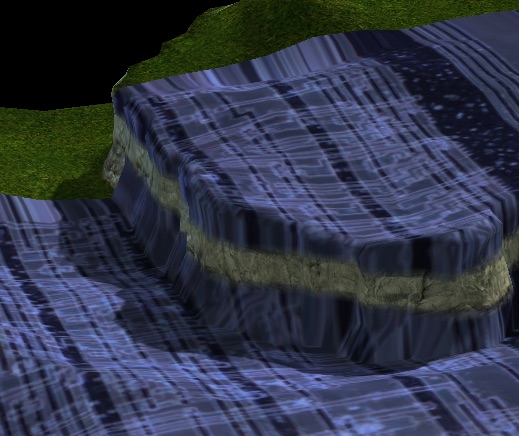
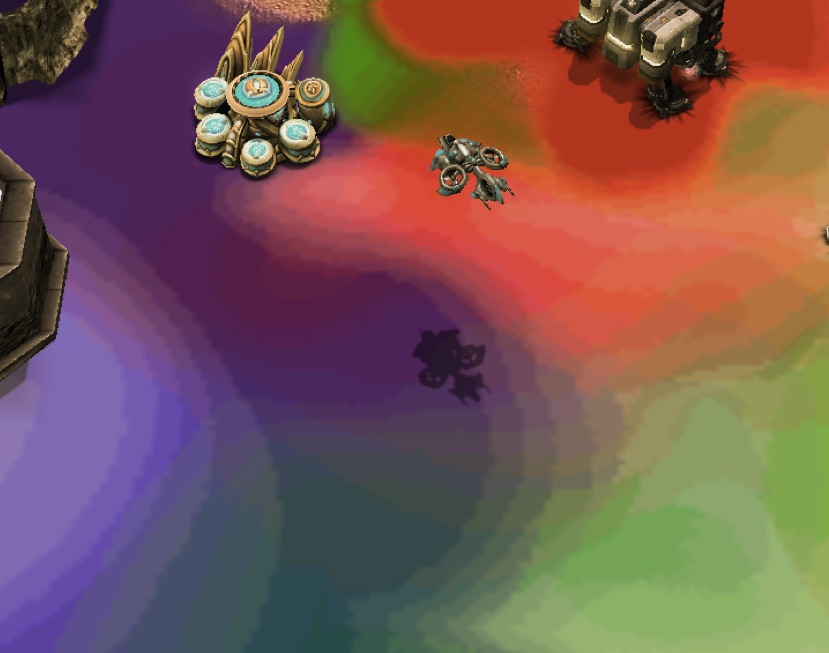
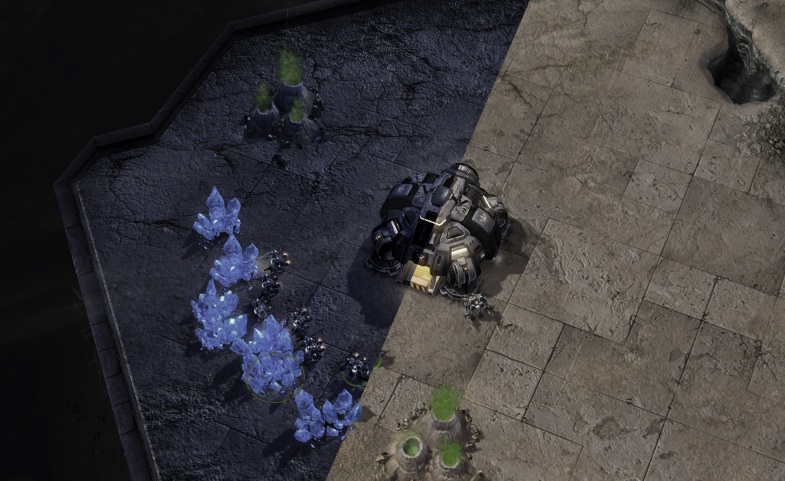
They follow the terrain perfectly, though they are limited in the height range they cover intentionally (this may even be hackable in the .m3 file)
So for example if you place a decal at the bottom of a cliff it won't affect the top of the cliff even if it overlaps. You can adjust the height of a Decal using page-up and page-down and you can see It's effects work in all 3 Dimensions. So if you duplicate the decal and place a copy in exactly the same spot but at a different height you can have it affect all heights like shown in above image. It even draws over the cliff face albeit stretched. So above example is done with 2 of the same decals that overlaps.
This should allow for painting in unique details like snow banks/drift, tracks in the mud or tracks snow, all kinda of unique texturing possibilities.
But must be careful of the file size and memory load!
Above is example showing how by changing the height of 2 decals you can make them join in the middle or have a gap of varying size:
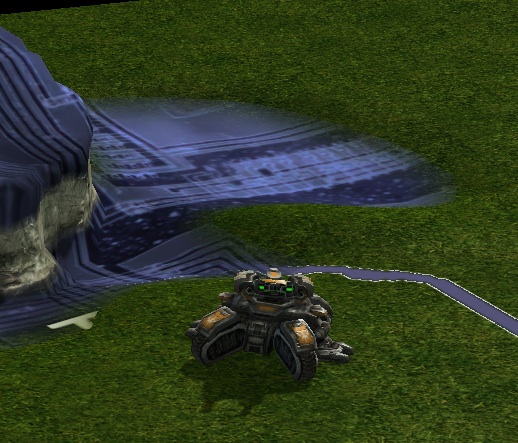
Here the decal is lowered and it only affects terrain at that lower height forming a pool, notice the soft edges
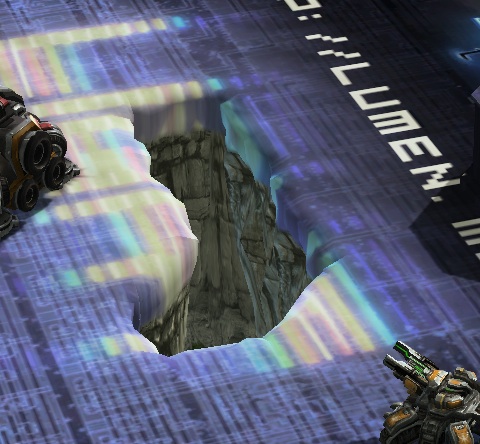
It even works across man made cliffs:
So how do you do it?
You can start with the existing Decals the game has right now
If you are lazy and don't mind overriding the existing Decals skip to step 3
Step 1:
Open the DataEditor and goto Actors and search for Decal
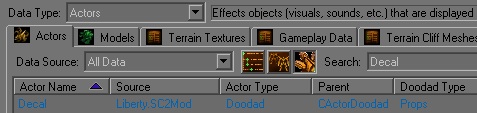
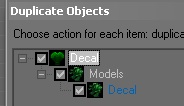
You can then right click on that and duplicate it and check all the contents when duplicated:
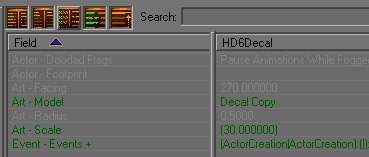
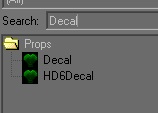
You can then name it whatever you like mine is HD6Decal
Also Decals are generally small so you need to increase the Art - Scale. Increase this too high and the deal will vanish, not sure what the maximum is, I used a value of around 30 here:
You can also Scale the Decal once placed in the map using KeyPad+ and KeyPad- or by pressing Enter and entering a scale, the scale here is limited to 500% I think.
Step 2:
Now in order to not overwrite existing Decals you need to export the .m3 models it uses, once exported you can open them in a texteditor like notepad+ and search for '.dds' and replace any texture references with ones of your own liking. This is a bit beyond the scope of this guide for now.
Step 3:
Now the Decal set that comes with the beta comes with many variations
If you open up the Previewer, you can search and find the separate Decal m3 models and inspect them:
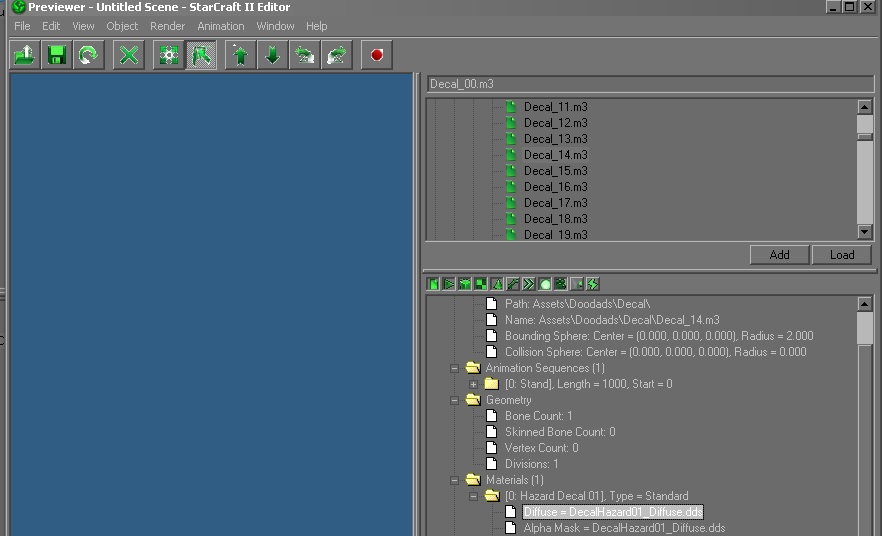
Here you can see it shows the Material uses a Diffuse Color Texture named 'Decalhazard01_Diffuse.dds' for Decal_14.m3
Knowing this you can go create your own high res texture and replace it. Or if you did earlier you can go into the exported m3 model and change the texture name to anything you like avoiding the need to override/overwrite it.
So go create a big texture can even have an alpha mask, make it 1024x1024px (can go bigger if you are brave and have good GPU) keep it to multiples of 8 in size so the size should always be divisible by 8.
Link: eliteforce2.filefront.com --- DDS_Converter;29412
Once you have the DDS, name it appropriately, if you are being lazy and overwriting then call it 'Decalhazard01_Diffuse.dds'
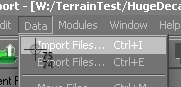
Then goto Starcraft Editor and click the file icon for Import:

Then goto Data menu and select Import:
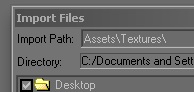
Navigate to the folder you want the DDS from and only tick the file you want to import.
Also set Import Path to Assets/Textures/
The game will override any same named textures and assets it finds in your map, making It very easy to override existing models and textures without permanently replacing anything.
You must save the map for the import to work, then you should be able to select it and see an image of it on the right panel. It will laos tell you how big it is, for me a 2048x2048px DDS came out to 1mb with moderate compression and no alpha.
Assets you override or import may not refresh right away so try closing and reopening Editor or map
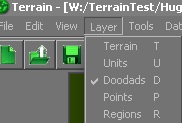
Goto the Terrain Editor and to Doodad Layer:
Search for your Decal:
And select it and then place it on the map
You can step thru a Doodads variations with ',' and '.' on the keyboard while you have the doodad selected in the editor, or specify it from the properties window (press enter while doodad is selected) You need to select the same variation you edited/replaced.
Once you see it, you can then adjust the scale and position.
Once you place a doodad select it and open the properties and tick on 'Ignore Placement Requirements' this will allow you to place them more freely and have them overlap.
It can be easier to make them overlap by entering the exact XY coords in the top 2 fields. Note you can also rotate Decals.
If you edit the terrain after placing a doodad it won't refresh in the editor, a simple way to refresh is to be in the doodad layer and select All with Ctrl-A then to delete, then to undo. That causes it to refresh and fit to the terrain underneath. It can make editing terrain difficult if a doodad/decal is in the way. In case you were wondering the decals do seem to update properly in game if the terrain changes, just the editor is borked.
I plan to use this extensively in my upcoming free maps and pay for mod:
Shameless Self Promotion:
If you found this helpful or inspiring please let me know and please please check out the work I am doing with StarCraft 2 and my upcoming mods and maps and ADD me or follow me!
Link: lumen.mine.nu
Link: www.facebook.com --- 121119821241522
I hope to be showing more interesting tutorials and tips, graphical tricks and sparkly shazzy free bits of re-usable code in future months to come
My name is Alex or Helios or HeliosDoubleSix and I am a Designer/3D Artist
I plan to produce quality content (some free for everyone and some pay for once marketplace is out)
I would love for others to work with so feel free to contact me directly if you are interested
E-Mail: sclumen@gmail.com
AIM: HeliosDoubleSix
MSN: msn@maniac66.idps.co.uk
Link: lumen.mine.nu
Technical Notes and Considerations:
Now 2048x2048 is probably going to kill some machines, older GPU's can't go over 1024, not sure what happens if it can't, maybe it explodes. Instead of one big texture I could cut it up into smaller squares and just align them. So in theory you can cover a whole map in as much or as little detail as you like. I can already think of one place that might help, if you want to make a Risk game with a big world map, currently a world map big enough to play on is impossible due to the map dimension limit, you could for example shrink the size of all units, zoom in and then rely on this texture to keep the terrain looking crisp and not blurry like it otherwise would be. No bets on how big in file size the map would be though or if it would crash some people? Theres all sorts of issues and limits and actually
Also when you create or export the 'SuperTexture' you can or should use .DDS and DDS has built in functions like various mip map levels which basically means it saves smaller resolution versions of the images, I have no idea if the game uses this at all especially when used on Mac in OPENGL mode. In theory if a computer couldn't load a 2048 pixel image it might fall back to a lower resolution, I am not sure.
When you import the Texture assets or change them you may have to quit and reopen the entire Editor to get it to refresh and update.
Older Experiments and Ideas
Some experiments I did prior from creating 5 solid color textures Cyan Magenta Yellow Black and White and mixing them together on the terrain to make a full color image covering the entire map, this does not use decals at all, and looks fruity as hell!
The color banding is from the low bit depth of the opacity masks used on terrain textures.
Decals just proved to be wiser given the fact the way it blends doesn't quite work to recreate CMYK/Full color image and it has a bit of a white edge along with the very low bitdepth/color banding AND you'd really need a custom tool to edit the masks directly and compute the image (no way you'd do it by hand) but otherwise in theory you could create a full color images across map at a lowish res. Oh and it doesn't support bump/normal maps so the surface would always be super smooth and flat looking.
More subtle example of It's colors.
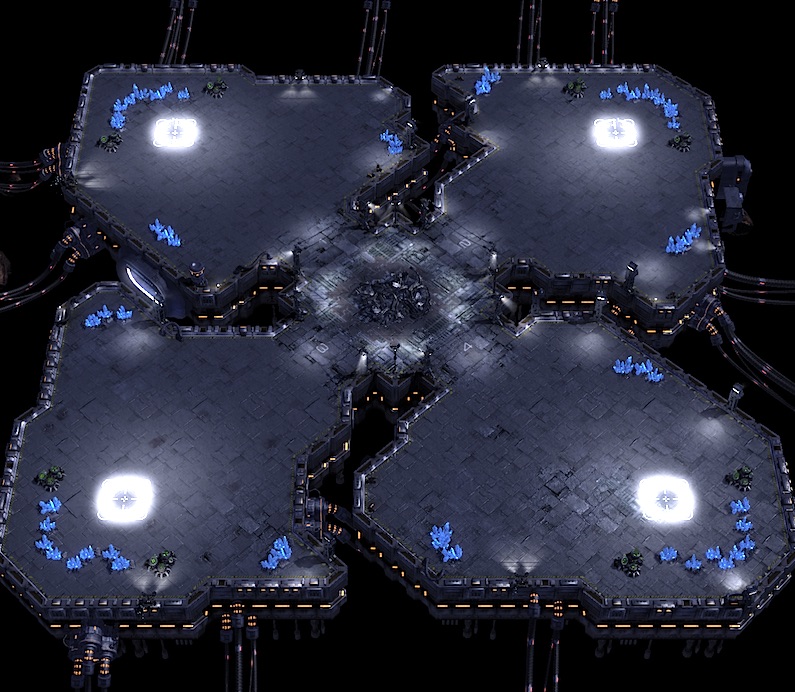
My new simple map BloodBath, remake of the original BloodBath map from Starcraft 1
It's available in the game on battle.net (when It's working) under the name 'BloodBath - HD6'
I have some nice Round based system working in it too now, where by once you would normal win or lose the game resets with a violent destruction and explosions of existing units. Then repopulates the map with starting resources and gas and plops you back down to fight again. It counts the score in a basic leaderboard and whoever wins the most in 3 or 5 rounds is declared the overall Victor.
Has some issues still with the score screen but otherwise works great, and is a wonderful thing to have on small close quarters maps like this and my Sealand map.
BloodBath.jpg)
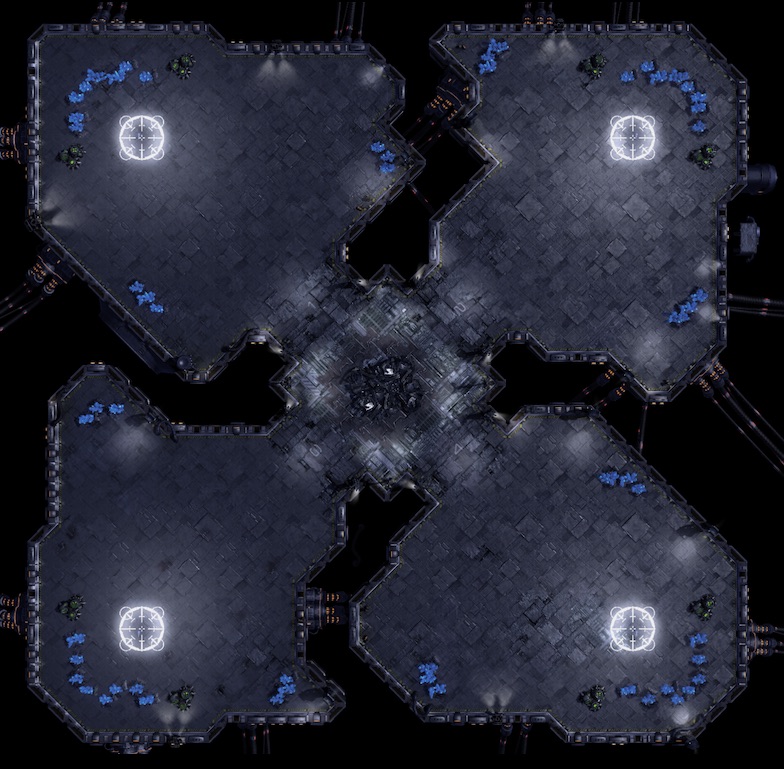
My First map!!
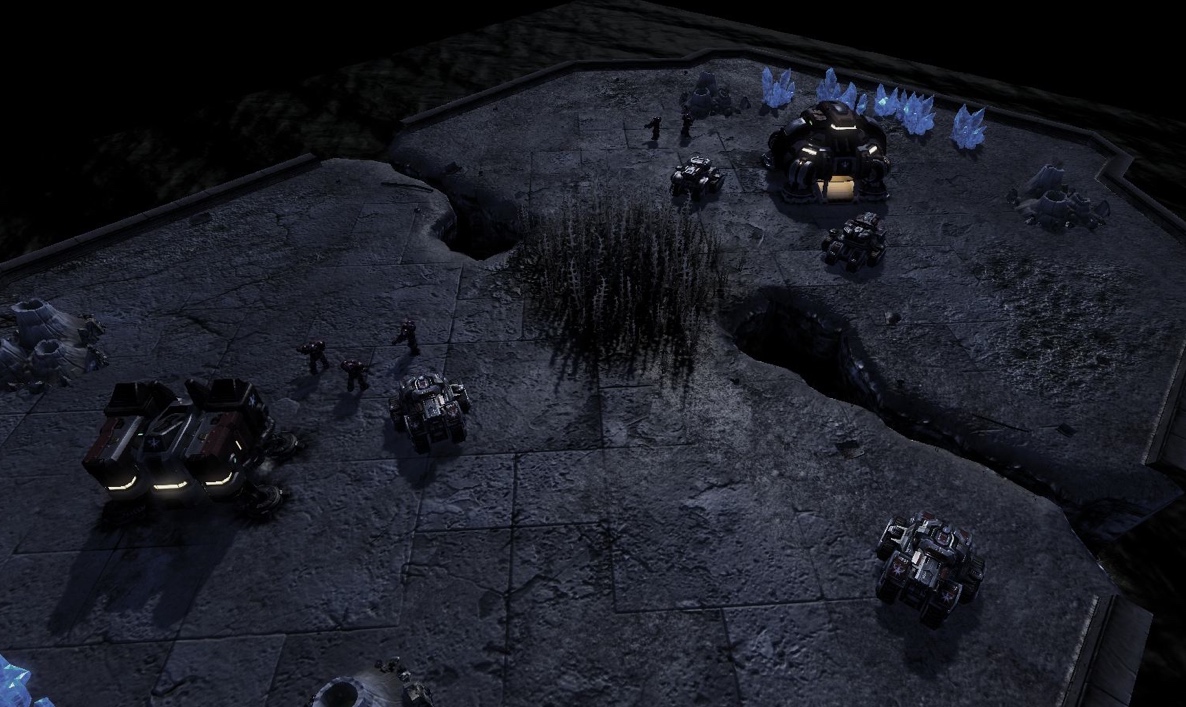
The Glorious Principality of Sealand!
I couldn't make it available on battle.net as it refused to let me because of some words it didn't like that I couldn't find or fix. No doubt blizzard will fix this stupid 'adult' filter for the final game!
A very very close quarters map designed for messing about and learning with friends as we practice. When you die the game resets water rises and drowns all units and buildings making them explode, then resets and you start the game a fresh without having to reload, allows for quick sparing and learning.
Has a paddling mode:
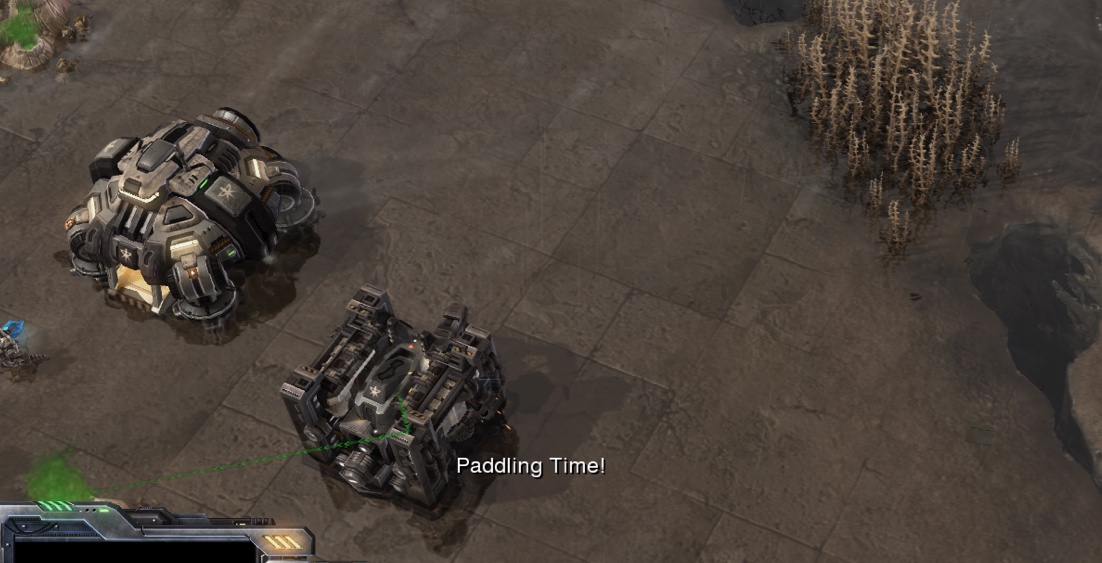
Which looks cool as you have a lil bit of water and everything reflects in it and shimmers.
It also can transition from day to night, at night you can't see past the bushes in the middle, in the day you can see everything.
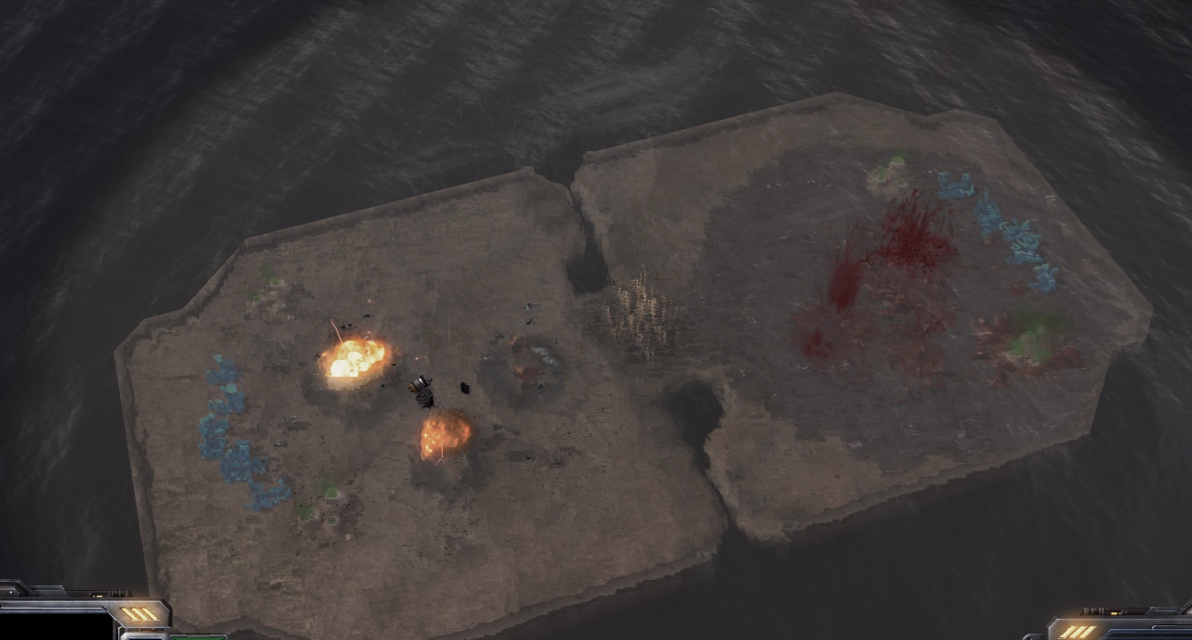
Game Resetting via a watery grave, the whole map sinks under the water as if on a pneumatic rig of some kind to cleanse a new again.
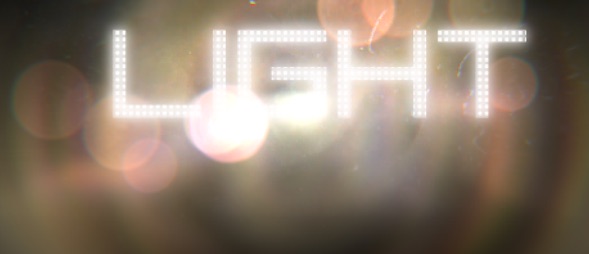
Found some brilliant tools for simulating lens flares in AfterEffects, works surprisingly well, It's not physically accurate or anything like Maxwell render but It's can recreate a lot of the cool effects with added bonus of tons and tons of manual control.
It's called Optical Flares and is quite quite good
Sadly again this helps me little (not at all) in making actual textures or art for lumen, but is cool still.
It's called Optical Flares and is quite quite good
:-)
Link: www.videocopilot.net --- opticalflares
Sadly again this helps me little (not at all) in making actual textures or art for lumen, but is cool still.

